Wicked Beernut Home - Halloween Home - Crate&Barrel

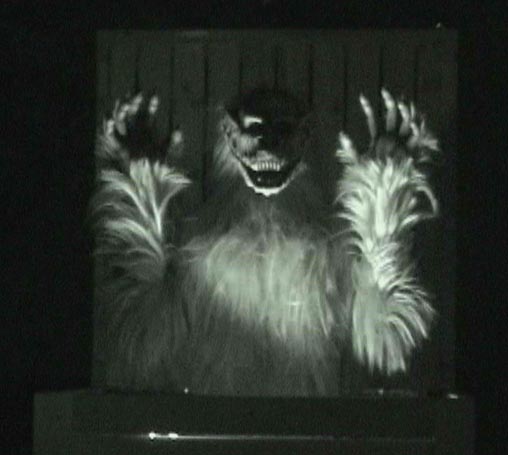
(This graphic is a conceptual illustration of the Crate Beast)
Most of
the pictures on this web page are thumbnails. Each thumbnail is 1/4 size and
1/4 quality of the full image, approximately 3K - 10K bytes. Each thumbnail is
a hyperlink to a full image that is approximately 30K - 100K bytes.
The
Premise
An
eerie green glow radiates from a weathered, wooden packing crate resting in a
sea of low-lying fog. Heavy chains and padlocks protect what must be valuable
cargo. As you move closer, you are startled by the sound of heavy breathing.
Someone, or something, is inside the crate. Suddenly, with a clamor of rattling
chains, the lid flies open and a hairy beast springs from the crate with a
ferocious growl. You have unleashed the Crate Beast.
Introduction
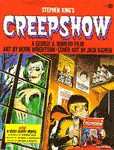
The horror movie "Creepshow" premiered in 1982,
 -
-
Creepshow was a two-hour movie made up of five short horror stories. One of those five stories was titled "The Crate" and featured Hal Holbrook, Adrienne Barbeau and "Fluffy". Fluffy was the brainchild of Tom Savini,
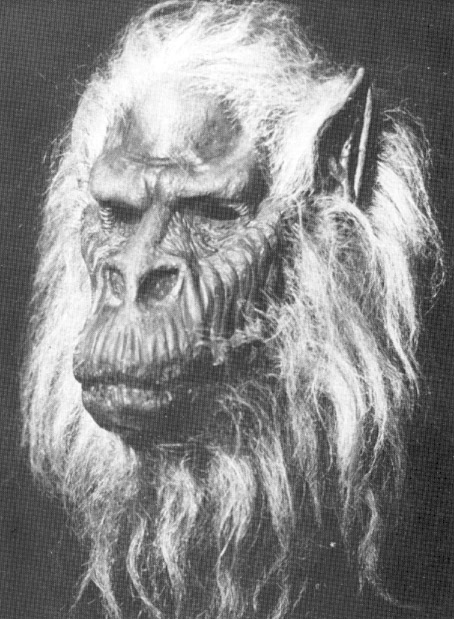
Jeff Death (Keim) of Death Studios has reproduced Fluffy. The Crate Beast was named after and uses Death Studio's Crate Beast mask,

Crate Beast was also inspired by Steve Hickman's The Terror Syndicate's The Crate,
Materials
|
(28) 1 x 4 (3/4" x 3 1/2") - 10' Resawn Trim Boards |
$114.30 |
I considered using wood pallets. I actually picked up a few at my local hardware store. But I think that it will be easier to simply use resawn trim boards. I'm planning on the crate being a 3' cube. There are 15 3' trim boards on each of six sides. That's 90 3' lengths of trim board. I can get three 3' lengths out of a 10' 1 x 4 trim board, therefore I need 30 10' trim boards. 28 x $3.81 = $106.68 |
|
(6) 2 x 2 (1 1/2" x 1 1/2") - 6' Pine Boards |
$11.88 |
I need 12 3' lengths of 2 x 2 pine board. I can get two 3' lengths out of an 8' board therefore I need six 2 x 2 pine boards. 6 x $1.98 = $11.88 |
|
Piano Hinge |
|
|
|
|
|
|
|
$135.00 |
|
|
|
$35.00 |
|
|
|
Gray Mask Hair, National Fiber Technology |
$110 |
I covered the entire upper body and arms of the Crate Beast with gray mask hair. This is the exact same synthetic hair used by Death Studio's Crate Beast Mask. |
|
|
|
|
|
(1) 8" x 16" 1/2" Plywood (Shoulder Plate) |
|
|
|
(2) 2x3-13 1/2" (Upper Arms) |
|
|
|
(2) 2x3-8 1/2" (Lower Arms) |
|
|
|
Drywall Screws |
|
|
|
1" Wood Dowel |
|
|
|
|
|
|
|
The Monster Makers Armature |
$49.95 |
|
|
|
|
|
|
XR-1592 Two-Part Expanding Rigid Urethane Foam |
|
I used rigid urethane foam to fill the monster hands. |
|
|
|
|
|
SMC Corporation 1-1/2" bore, 10" stroke, Double-Acting Air Cylinder, Motion Industries, Inc. |
|
I used a single cylinder to lift the beast and the lid. |
|
SMC Corporation Sub-plate, SPF0191-02, Motion Industries, Inc. |
$16.75 |
|
|
SMC Corporation Valve Body and Solenoid (1), NVFS2100-3FZ, Motion Industries, Inc. |
$54.30 |
(refer to Sub-plate) |
|
Mannesmann-Rexroth Flow Control Valves (1), 540-632-600-1, Motion Industries, Inc. |
$12.80 |
I used a single flow control valve. |
|
Mannesmann-Rexroth Foot Bracket, ML073790048, Motion Industries, Inc. (different foot bracket) |
$2.95 x 2 = $5.90 |
The foot bracket made it much easier to connect the cylinder to the bottom of the crate and the fifth linkage of the four-bar linkage to the underside of the lid. |
|
|
|
|
|
Radio Shack, 20-Second Recording Module, 276-1323, http://www.radioshack.com |
$9.99 |
I used a Radio Shack recording module for the growl. |
|
First Step Microcontroller Kit (unassembled), #3-475, http://www.robotstore.com |
$32.00 |
|
|
Crydom Solid State 5A SIP DC, CX240D5, CC1063-ND, http://www.digikey.com |
$9.02 x 2 = $18.04 |
SSRs are used to switch the green lights, solenoid valve and the strobe lights from the stamp. The solenoid valve and the strobe lights were switched using a single SSR. |
|
Momentary SPST Switch, #275-618, http://www.radioshack.com |
$1.89 |
The momentary SPST switch serves as the reset button. |
|
Green Blinking LED, #276-305, http://www.radioshack.com |
$1.69 |
The blinking green LED serves as a prop-ready indicator. |
|
LED Holder, #276-079, http://www.radioshack.com |
$0.59 |
(refer to Green Blinking LED) |
|
Air Conditioner Junction Box |
|
|
|
Crydom Relay Board |
|
|
|
5 1/2" Clamp Lights (2), Orchard Supply Hardware |
$7.99 x 2 |
The clamp lights, in conjunction with a green light bulb, provided the eerie green glow coming from inside the crate. |
|
Green Light Bulbs (2) |
|
|
|
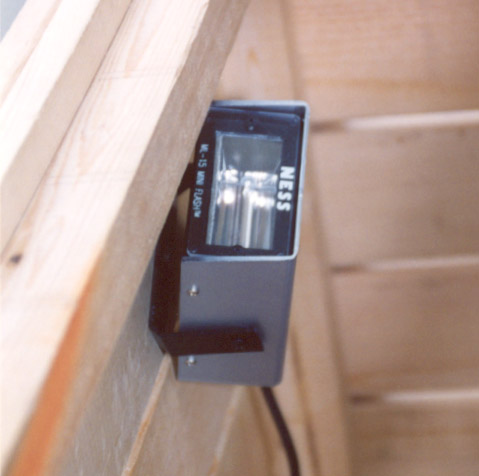
Ness Variable-Speed, Mini 20-Watt DJ Strobes (2) |
$8.00 x 2 |
I used a pair of mini strobe lights to illuminate the beast after it sprung from the crate. |
|
Metal Standoffs (10), #276-195, http://www.radioshack.com |
$1.29 - Set of Four x 2 = $2.58 |
The metal standoffs are used in conjunction with the stamp and the Radio Shack recording module. |
|
(1) 1/8" Phono Plug Jack, http://www.radioshack.com |
|
The phono plug jack is used to connect the amplified speakers to the Radio Shack recording module. |
|
Heavy Duty 9 V Battery Snap Connectors, #270-324, http://www.radioshack.com |
$1.89 - Package of Five |
The 9 volt snap connectors are used to connect the stamp and the Radio Shack recording module to the 9 volt transformer. |
|
300 mA 9 V Transformer, #273-1767, http://www.radioshack.com |
$8.99 |
The 9 volt transformer is used to power the stamp and the Radio Shack recording module. |
|
Amplified PC Speakers |
|
|
|
Amplified Subwoofer |
|
|
|
4" x 2 1/8" Handy Box (Single Outlet), Duplex Cover and White Duplex Receptacle, Orchard Supply Hardware |
$0.59 + $0.39 + $0.49 = $1.47 |
The 4" x 2 1/8" handy box is used to supply power to the solenoid valve(s) and strobe light. |
|
4" Square Outlet Box (Dual Outlet), Cover and White Duplex Receptacles (Two), Orchard Supply Hardware |
$1.39 + $0.89 + 2 x $0.49 = $3.26 |
One 4" square outlet box serves as the main junction box. The SSRs, amplified speakers and 9 volt transformer connect to the main junction box. |
|
4" Square Outlet Box (Dual Outlet) and Cover, Orchard Supply Hardware |
$1.39 + $0.39 = $1.78 |
One 4" square outlet box serves as a project box for the stamp, SSRs and Radio Shack recording modules. |
|
6' Household Extension Cord (1 or 2) |
$1.49 x 1 or 2 = $1.49 or $2.98 |
The extension cords are used to wire the solenoid valve(s) to the 4" x 2 1/8" handy box. |
|
3-Wire Electrical Cord with Grounded Plug |
|
The 3-wire electrical cord will supply power to the main junction box. |
|
3/8" Romex NM Connector (4), Orchard Supply Hardware |
$0.99 - 4 Connectors |
The connectors are used to secure the electrical cords to the junction boxes. |
|
1/4" NPT x 1/4" Compression Fittings (3 or 6), Motion Industries, Inc. |
$2.18 x 3 or 6 = $6.54 or $13.08 |
The compression fittings are used to connect the polyethylene tubing to the solenoid valves. You need three compression fittings per solenoid valve. |
|
Teflon Thread Seal Tape |
$1.19 |
|
|
1/4" NPT Female Plug Air Quick-Disconnect Fitting |
|
The air quick-disconnect fitting is used to connect the input air. |
|
1/4" Brass Nipple |
$1.09 |
The brass nipple and couple are used to connect the air quick-disconnect fitting through the side of the crate. |
|
1/4" Brass Couple |
$1.79 |
(refer to 1/4" Brass Couple) |
|
2' of 1/4" Polyethylene Tubing |
$0.07 per foot |
The polyethylene tubing is used to plumb the air quick-disconnect fitting to the solenoid valve(s) and the solenoid valve(s) to the cylinders. |
|
|
$650 - $700 |
|
Crate
Construction Plans
The crate will be constructed from 2 x 2 pine boards and 1 x 4 resawn trim boards. Figures 1 - 5 are all hyperlinks to PDF files.
|
Figure 1 |
Figure 2 |
Figure 3 |
Figure 4 |
Figure 5 |
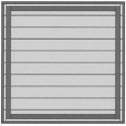
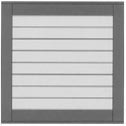
Figure 1 shows the 36" lengths of 1 x 4 (3/4" x 3 1/2") resawn trim boards that form the four sides of the crate. There are 1/4" gaps between each board. The trim boards that form the top and bottom border are 3" wider than the boards that form the sides,
(3/4" x 4) + 36" = 39"
The trim boards that form the border on the sides are the same height as the boards that form the sides,
(1/4" x 9) + (3 1/2" x 10) = 37 1/4"
The overall height of the crate equals,
(3/4" x 2) + (1/4" x 9) + (3 1/2" x 10) = 38 3/4"
Figure 2 shows somewhat of a cross-sectional view of the crate from the inside. The 35 3/4" and 33" 2 x 2 (1 1/2" x 1 1/2") pine boards form the crate frame. The overall width of the crate equals,
(3/4" x 4) + (1 1/2" x 2) + 33" = 39"
The overall height of the 2 x 2 frame equals,
(1/4" x 9) + (3 1/2" x 10) - (3/4" x 2) = 35 3/4"
Note that the top and bottom 1 x 4 trim boards on each side extend 3/4" above and below the 2 x 2 frame, respectively. The 36" lengths of 1 x 4 trim board that will form the top and bottom will rest flush with the top and bottom 1 x 4 trim boards on each side.
Figure 3 shows the same side view depicted in figure 1 only with a border formed from 1 x 4 trim boards. Note that the overall width of the crate with the border is the same as the overall width depicted in figure 1,
32" + (2 x 3 1/2") = 39"
Figure 4 shows somewhat of a cross-sectional view from the top and bottom. On the top, the 36" lengths of 1 x 4 trim board will be shortened by 1/2" to provide adequate clearance from the sides of the crate. The 2 7/8" x 36" trim boards on the bottom will be ripped to 2 5/8" on the top, again, to provide adequate clearance. Note that a border of 1 x 4 trim boards will be applied over the 36" slats shown in figure 4. The final construction of the lid is slightly different than what is depicted in figure 4. The slats actually run all the way to the back of the crate and are secured to the stainless steel piano hinge.
Figure 5 shows a view from the side adjacent to the side depicted in figure 3. The trim boards that form the border on the left and right side will be 2 3/4" x 37 1/4" and will butte up against the 3 1/2" border of the adjacent sides. Again, the overall width of the crate is,
(3/4" x 2) + (2 3/4" x 2) + 32" = 39"
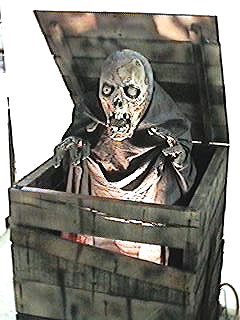
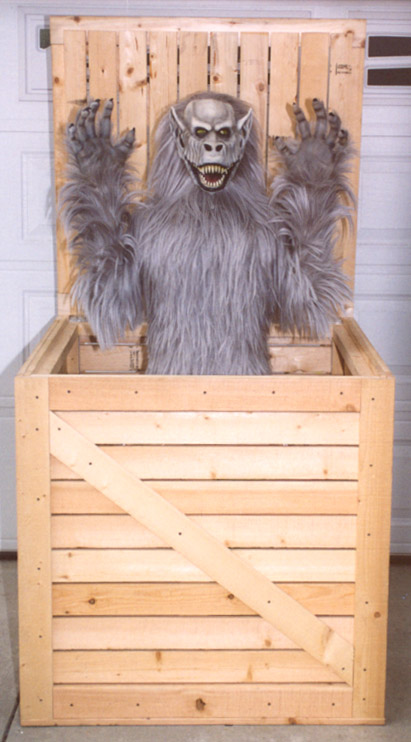
Here is a picture of the finished crate.
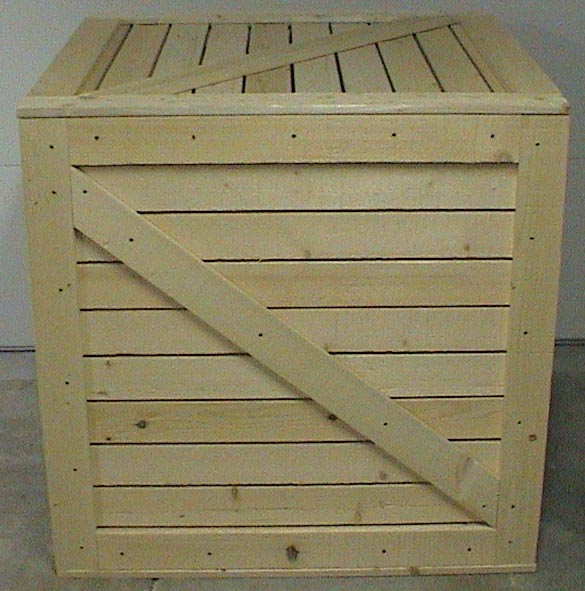
I never got around to aging and distressing the crate or adding chains and padlocks, maybe next year.
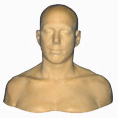
Armature
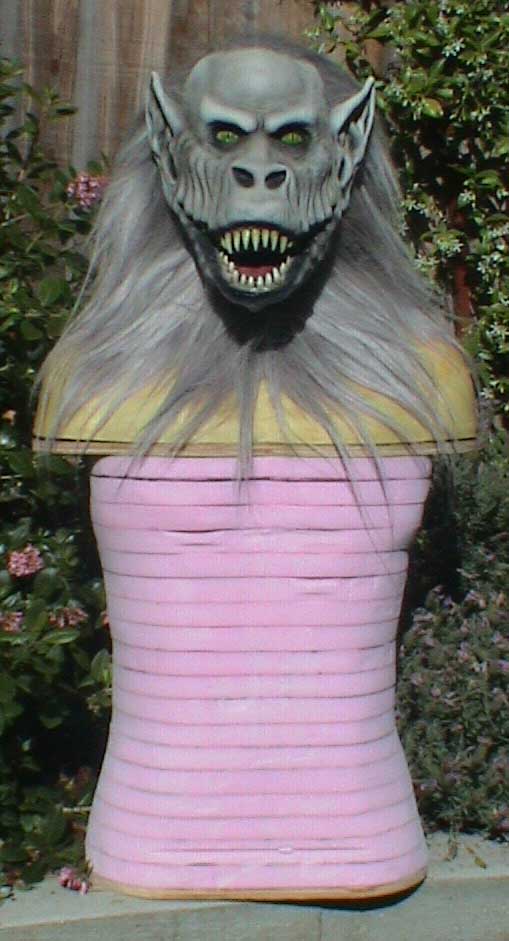
The Crate Beast armature was constructed in two halves: an upper half consisting of the head, shoulders and upper torso; and a lower half consisting of the lower torso and arms.
The upper half of the armature was based on a rigid urethane foam armature from The Monster Makers,
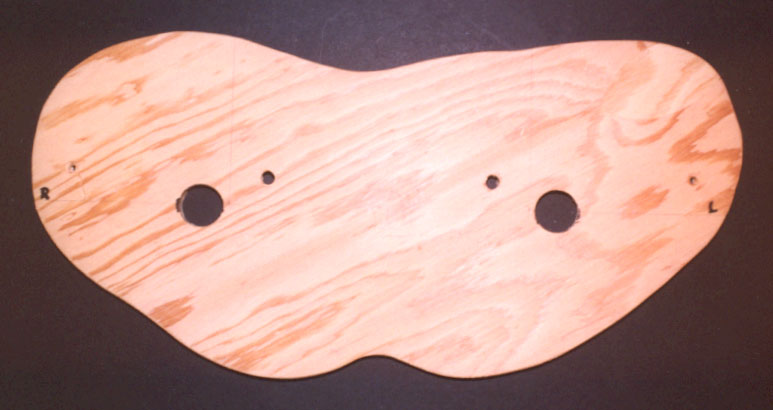
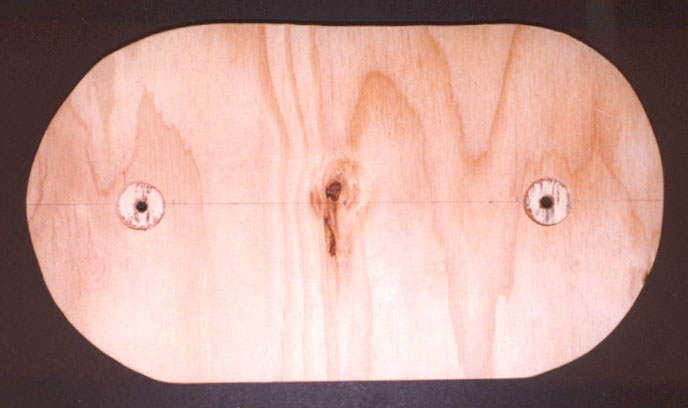
The outline of the rigid foam armature was traced onto a sheet of plywood, cut out and glued to the bottom of the rigid foam armature,
The lower half of the armature was formed from 18 layers of 1" Dow pink insulating foam board.
The layers of foam board were sandwiched in between a pair of plywood plates,
-
I pair of wooden dowels ran from the lower plate, up through the layers of foam board, through the upper plate. The wood dowels were secured to the lower plate with wood screws and glue.
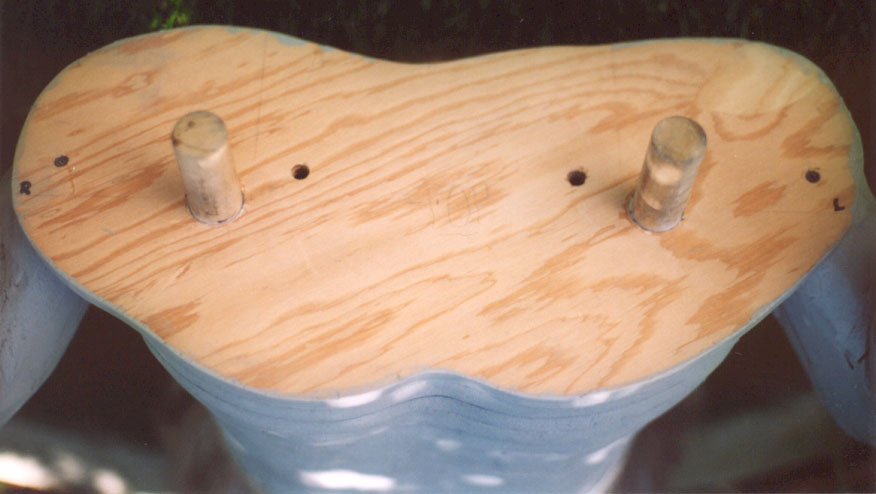
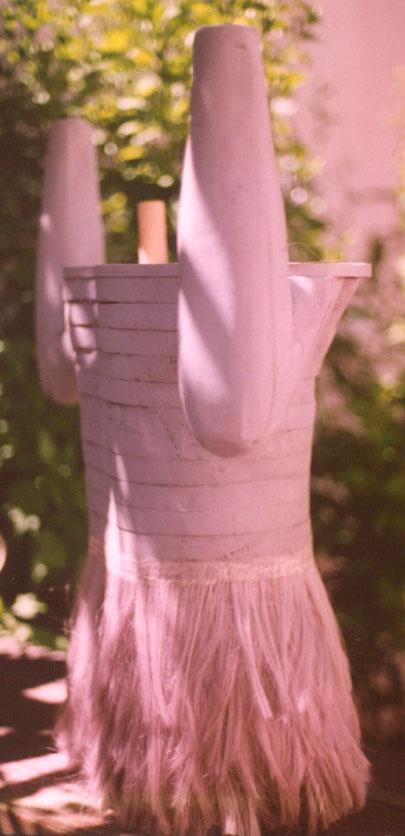
This picture shows the two halves of the armature assembled. The cut-out in the back of the lower half of the armature is to accept the four-bar linkage,
 -
-
The arms were constructed from 2x3s. Foam board was glued to all four sides of the 2x3s and then contoured using a palm sander.
This picture shows the wood dowels running up through the top plywood plate. You can see that the arms have been attached to the underside of the top plywood plate using a single wood screw and glue. The assembly was primed with gray paint.
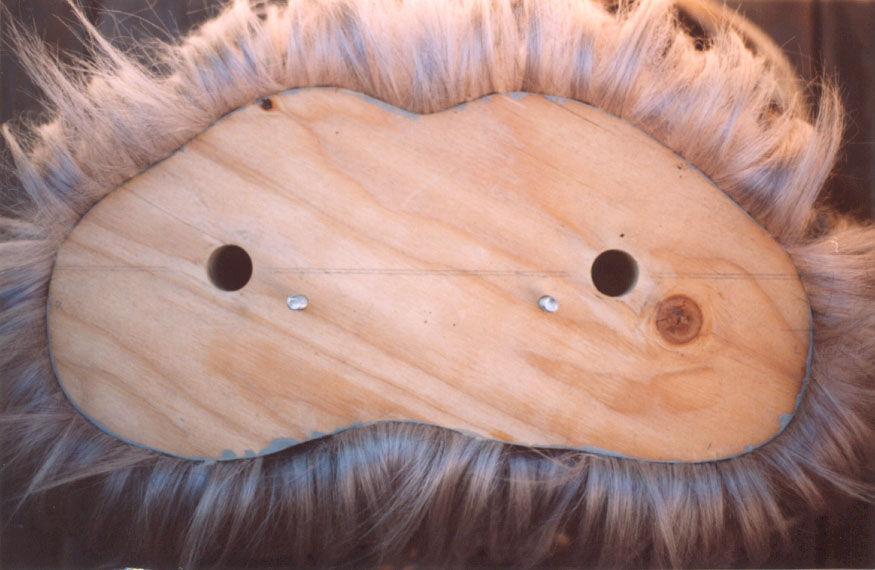
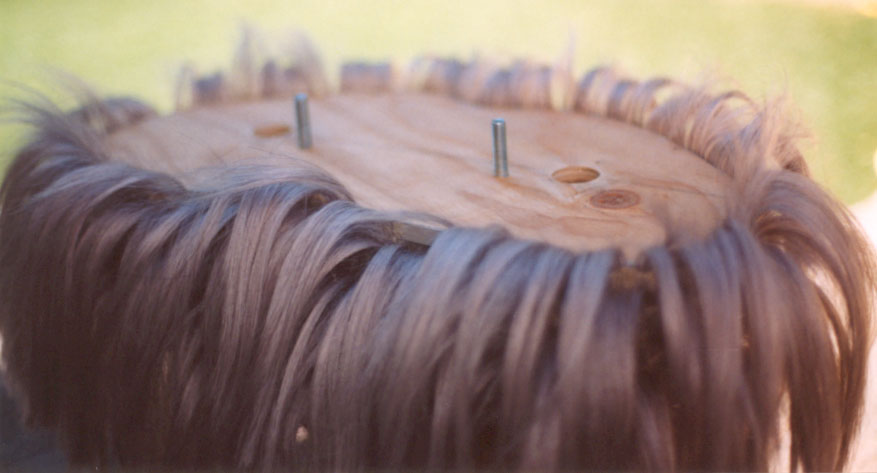
These photographs depict the underside of the top half of the armature after the hair was laid. You can see the 3/8" bolts that pass through the two plywood plates and the mounting platform of the four-bar linkage.
 -
-
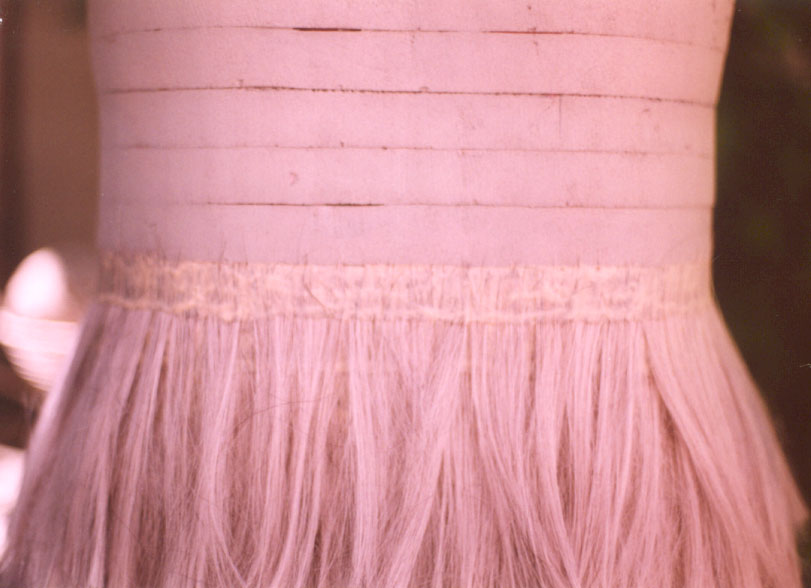
These photographs depict the lower half of the armature as hair was first being applied. Note that the hair was laid in 1" rows corresponding to the layers of foam board.
 -
-
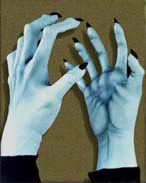
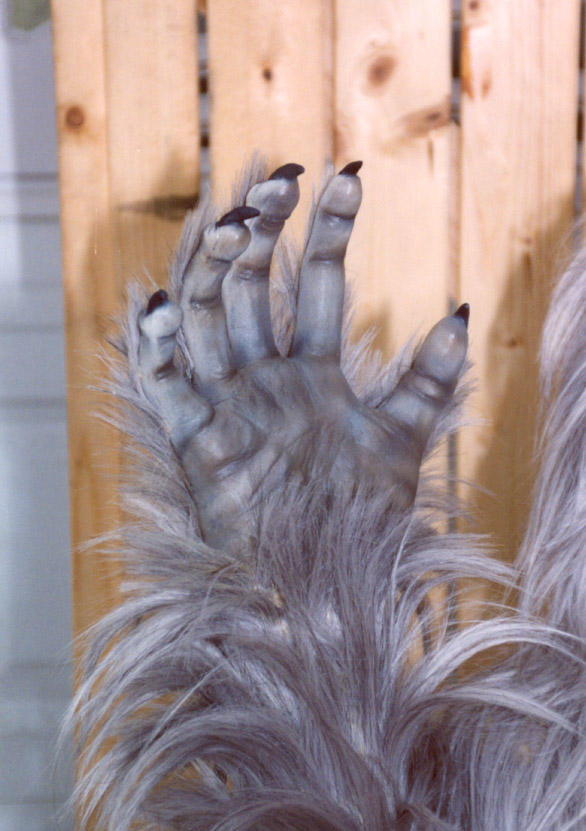
I purchased a special pair of Death Studios' Monster Hands to match the paint and fur of the Crate Beast mask. I filled the hands with XR-1592 rigid urethane foam. Unfortunately, I failed to make a mother mold from the hands. They ended up looking more like the hands of the Michelin Man than a monster. I did my best to smash the hands back into form. I drilled a 1" hole into the foam at the wrist of each hand in order to accept a wood dowel. I "glued" the dowels into the wrists using a small portion of rigid urethane foam. This also helped to restore the rigidity of the original foam that had been partially crushed in trying to restore the shape of the hands.
Always
make a mother mold when filling a latex prop with expanding foam!!!
Death Studio's simply applies hair around the wrists of the hands, creating a rather unnatural plume. I extended the hair up the back of the hand and fingers.
I ended up completely re-airbrushing the hands. The mask latex paint didn't adhere terribly well to the existing (likely sealed) paint. Arnold Goldman recommended a combination of Perma-Wet and matting agent that seems to have worked really well in holding the second coat of latex paint to the first.
Mechanics
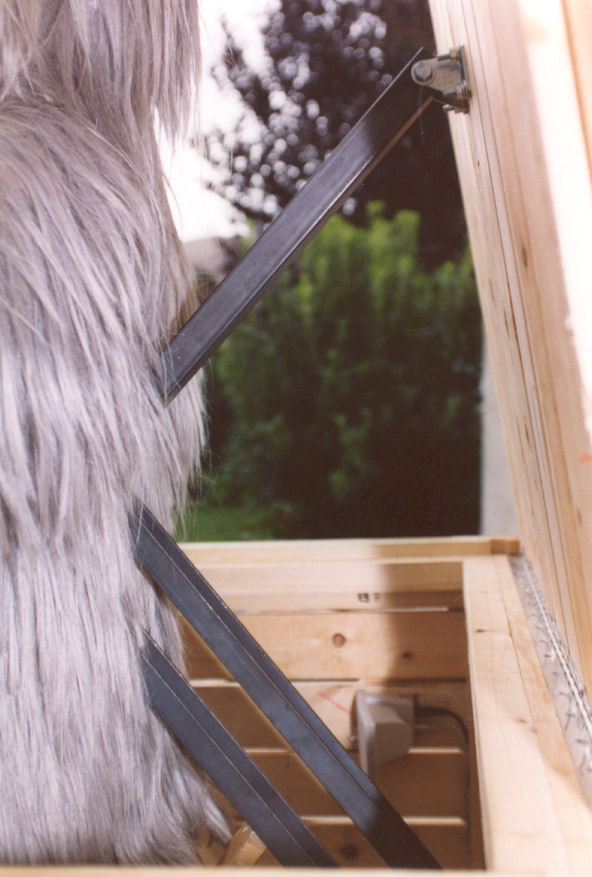
The Crate Beast used a four-bar linkage. The four-bar linkage was very similar in construction to the four-bar linkage that I used as part of my Grave Jumper. The crank and follower were constructed from pairs of 1" metal bars. The ground and coupler were constructed from 1-1/4" square metal tubing.

Here you can see the "fifth bar" that runs from the follower to the underside of the lid.
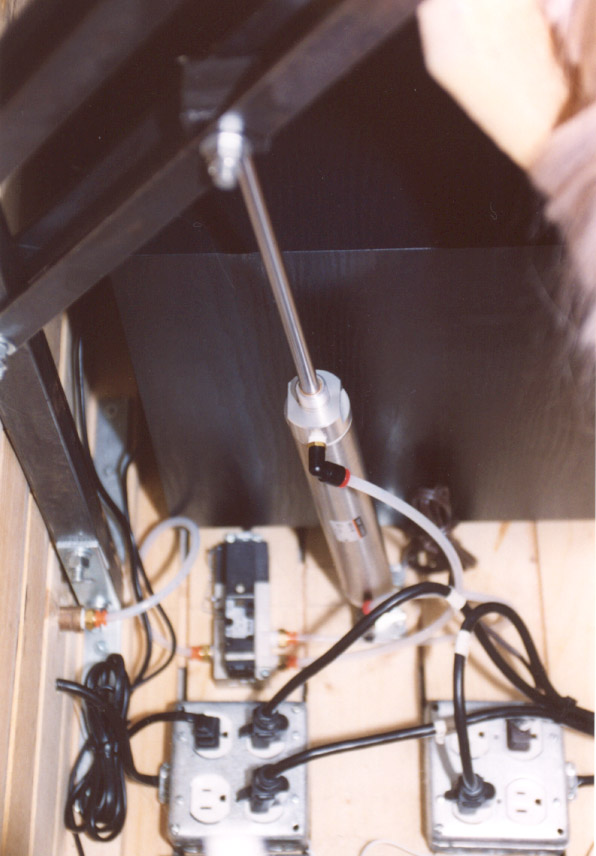
Here you can see the 1-1/2" bore, 10" stroke double-acting cylinder. If you look closely, you can see that I only used a single flow control. There was no need to restrict the flow of air as the cylinder extended. The flow control at the base of the cylinder was used to slow the speed at which the lid closed.
Lighting
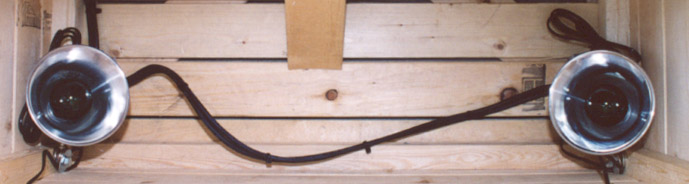
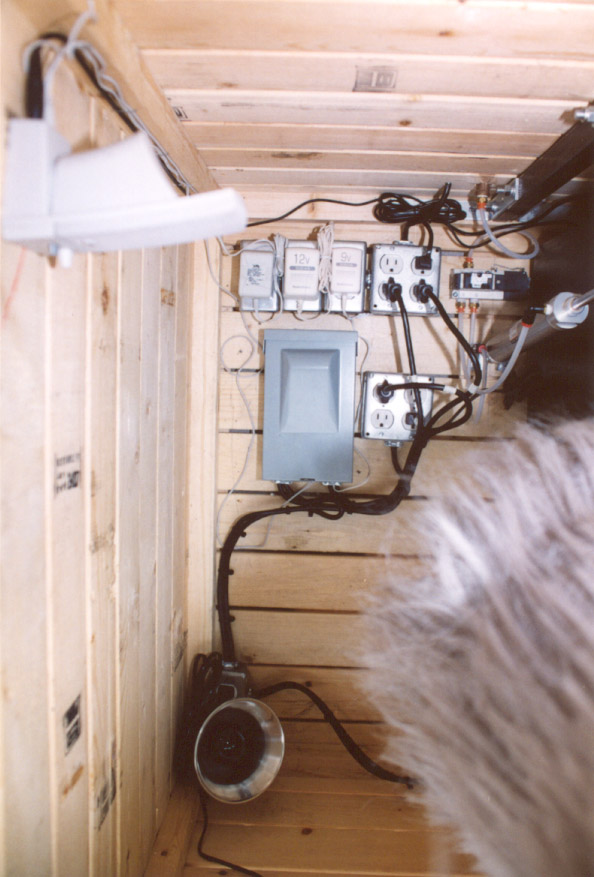
Here you can see the two 5 1/2" clamp lights with green incandescent bulbs in the front left and right corners of the crate that illuminated the beast before it sprung from the crate. [The board in the middle was simply used to prop up the beast while the picture was taken.] Each clamp light is plugged into a junction box that is secured to the floor of the crate. [The junction boxes are hidden behind the clamp lights in this picture.]
This shot is of one of the two strobe lights that illuminate the beast as it springs from the crate. The strobe lights also plug into the junction box located underneath the clamp lights.
Sound
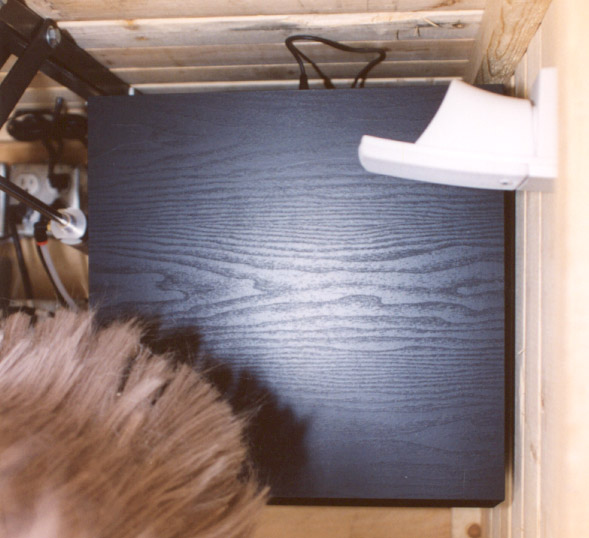
The sound was produced using an inexpensive pair of amplified PC speakers with a subwoofer output. The subwoofer output was connected to a Jensen amplified subwoofer. Here you can see one of the two PC speakers secured to the side of the crate. The subwoofer is screwed to the bottom of the crate (through the 1-1/2" rubber feet).
Electronics
The whole prop was controlled by my favorite BASIC stamp I, the First Step microcontroller. The eight I/O were used for,
- Solenoid Valve (SSR) and
Mini Strobe Light
- Growl Recording Module
- Ready Indicator
- Green
Incandescent Lights
Improvements
In the future, I hope to,
- Incorporate my Heavy Breather. My Heavy
Breather was designed to be used with the Crate Beast.
- Add chains and padlocks.
Even with the enormous weight of the four-bar linkage, armature and lid, I
think that I can violently rattle the chains by switching the solenoid
valve on and off using the microcontroller.
- Incorporate
pneumatic "feet" into the bottom of the crate. I'd like to
position a short-stroke, large-bore cylinder in each corner of the crate
with round feet. The microcontroller would fire the cylinders in sequence
causing the crate to rock.