
Wicked Beernut Home - Halloween Home - Monster Mud Props
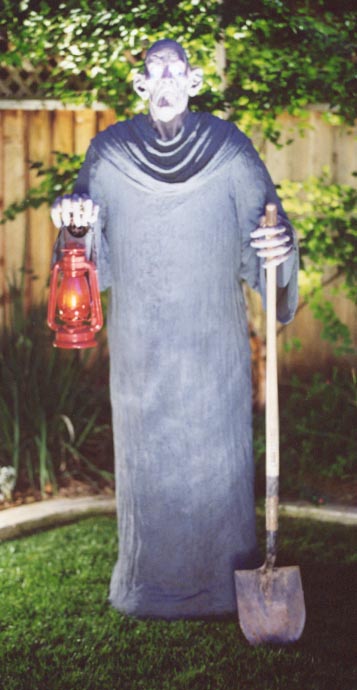
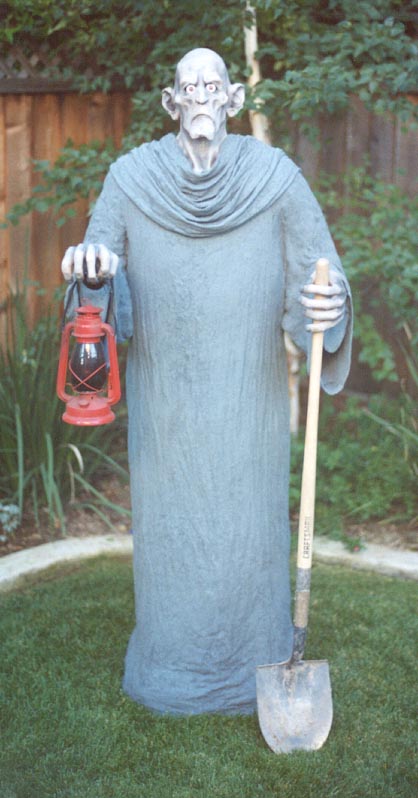
The Undertaker
Most of the pictures on this web page are thumbnails. Each thumbnail is ¼ size and ¼ quality of the full image, approximately 3K - 10K bytes. Each thumbnail is a hyperlink to a full image that is approximately 30K - 100K bytes.
Winner of the inaugural Terror Syndicate Prop Builders Guild Award, September 2001!
 -
- -
-
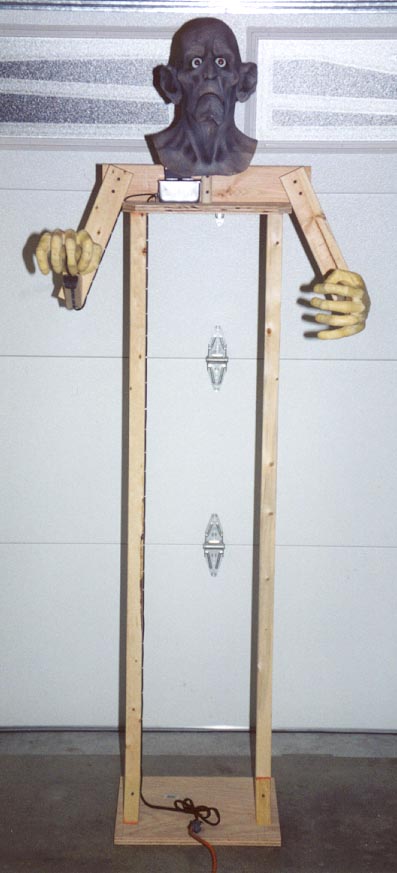
Main Construction
The Undertaker was inspired by (shamelessly stolen from) Steve Hickman's Terror Syndicate. The Undertaker is a cross between Steve's Acolyte and Watcher. The construction of these two props is detailed in Steve's Home Haunter's Prop Building Handbook #2. I highly recommend all of Steve's handbooks.
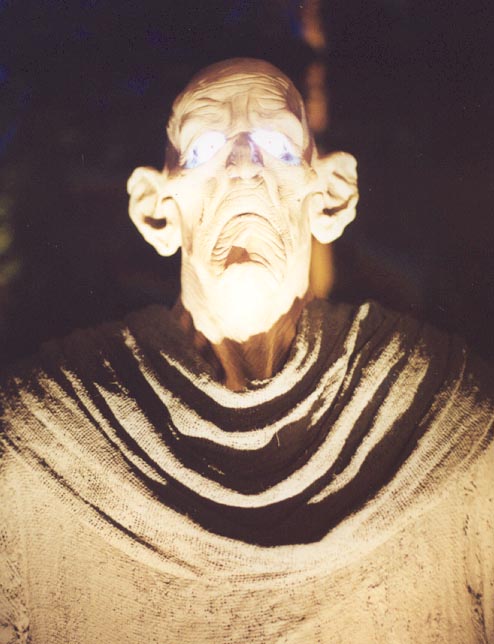
The Head
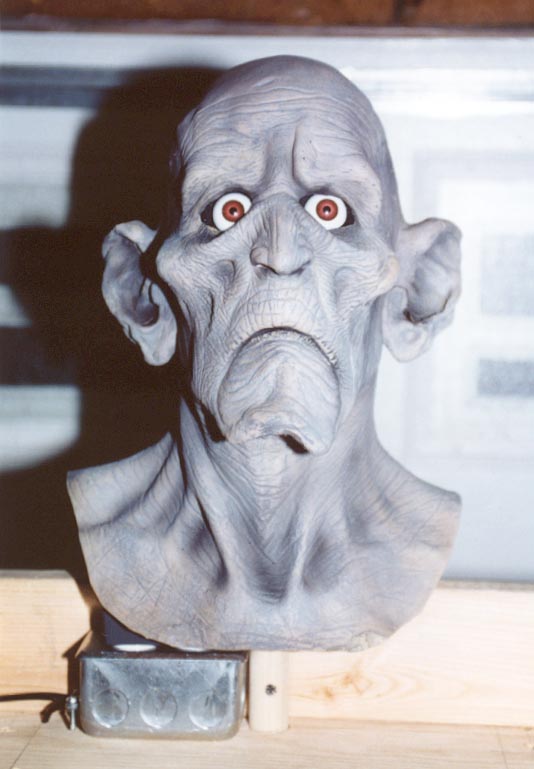
The mask is titled 'Dead Guy' and was designed by Erich Lubatti at Lubatti Illusions. I purchased the mask from the Halloween Outlet for $59. The mask came with rather cheesy, wispy hair that I pulled off.
I bought a pair of $6.95 brown, full, round, acrylic eyes from the Monster Makers.
I pulled the mask over a male wig head and traced the holes corresponding to the eyes with a Sharpie marker. I removed the mask from the wig head and began to gouge out the eye sockets using a Dremel until they would accept the acrylic eyes.
I purchased a pair of white LEDs (Catalog #276-320) from Radio Shack for $4.99 each. I soldered a pair of 12" color-coded wires to each LED. The color-coding corresponds to the polarity of the LEDs.
The T 13/4 LEDs fit perfectly into the stem of the acrylic eyes. I opted to epoxy the LEDs to the acrylic eyes. The two halves of the acrylic eyes twist apart. I epoxied the two halves of the acrylic eyes together.
I used a long drill bit to drill a hole from the back of each eye socket through to the back of the wig head. I fed the wires from each LED through their respective hole. I soldered the positive wire of one LED to the negative wire of the other LED. I used Doug Ferguson's equation from Phantasmechanics to calculate the resistance of the ballast resistor.
Rballast = (Vpower supply - VLEDs) / 0 .015 = (9 - 3.6 - 3.6) / 0.015 = 120 W
I soldered the remaining positive and negative wire to an AC-to-DC 9-volt transformer with the ballast resistor between the positive wire of the LED and the positive wire of the transformer.
The Hands
 -
-
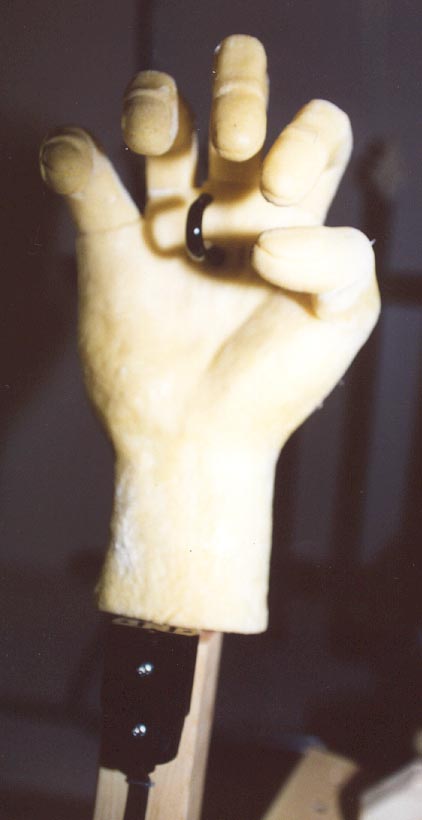
I used a pair of Steve's Gravestalker prop hands.
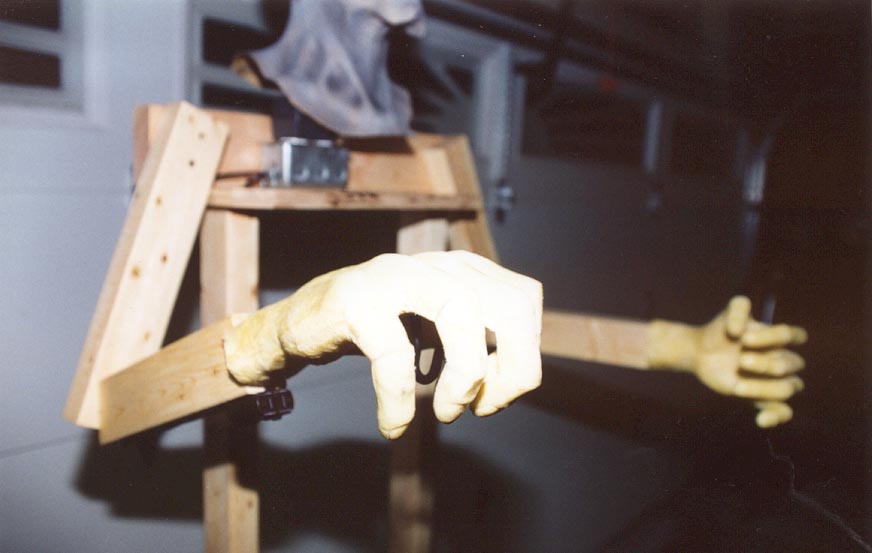
I started by numbering the phalanges of each hand (all of the phalanges of a given finger or thumb had the same number). I then used a hacksaw blade to cut off each phalange at each knuckle. I then cut a 'wedge' from the end of each phalange such that when the phalanges were reassembled the resulting hand would be in the form of a fist. I dry-fit the phalanges of each finger and then glued them together with epoxy glue. You'll notice that the fist of the hand that holds the lantern is a little tighter than the hand that holds the shovel.
I used a 1" spade bit to drill a hole into the wrist of each prop hand to accept a 1" wood dowel. In the case of the hand that holds the lantern, I drilled the hole almost to the fingers. In this case, the wood dowel accepts a hook to hold the lantern. You need to be extremely careful not to break through the palm or the back of the hand. I slid a length of black drip tubing over the hook to help hide it. The hook can be removed while the hand is being painted.
I used a foam brush to blot each hand with mask latex from the Monster Makers.
Once the mask latex was dry, I airbrushed each hand with medium flesh colored mask paint from the Monster Makers. I highlighted the hands with a touch of gray (a custom blend of light flesh and black mask paint) in an attempt to match the Dead Guy mask.
The Lantern
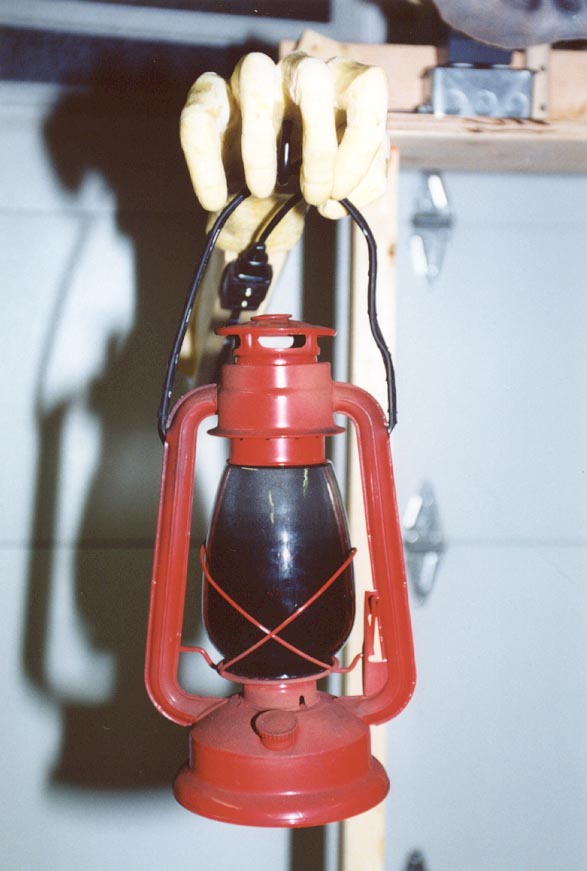
I bought the kerosene lantern from Camping-R-Us.com for $6.99.
I started by removing the glass lens from the lantern.
The vertical supports of the lantern are actually hollow. I drilled a small hole in one of the supports just below where the wire hanger is attached. I carefully fed electrical wire through this hole, through the vertical support and into the base. I wired the lantern with a candelabra base.
I taped a small plastic sandwich bag over the lens of the lantern. I lightly sprayed the inside of the lens with flat black spray paint in order to create the illusion of soot. I may have overdone it a bit, but the soot helps to hide the cheesy effect of the hardware store flicker bulb.
I used epoxy glue to secure the electrical wire to the wire hanger. I used cable ties to hold the electrical wire in place while the glue dried.
I lightly dusted the entire lantern with flat black spray paint in order to age it a bit and then replaced the glass lens.
The kerosene lantern plugs into a socket that is secured to the underside of the right forearm. An electrical wire runs from the socket to a junction box that is mounted on top of the shoulder plate. The electrical wire is stapled along the length of the arm.
![]()
The LED transformer plugs into the junction box. An electrical wire runs from the junction box along one of the 60" 2x3s which form the main supports for the body. I stapled the electrical cord along the length of the 2x3s.